Get started
This guide walks you through integrating a theme app extension into a theme, from creation to publication.
Prerequisites
-
Create a SHOPLINE partner account.
-
Create an app in the Partner Portal.
-
Create a development store in the Partner Portal.
-
Install your app in the development store.
-
Install the SHOPLINE CLI.
-
Install an OS 3.0 version theme for your development store.
Step 1: Create a theme app extension locally
Use the SHOPLINE CLI to locally create a directory for your theme app extension.
- Open a terminal and navigate to an empty directory.
cd <my-directory>
- Log in to your development store.
sl login --store <MY_STORE>.myshopline.com
- Create a theme app extension.
sl extension create
-
Follow the prompts to select the appropriate options. After completing the selections, you will see a folder named
theme-app-extensionin your directory.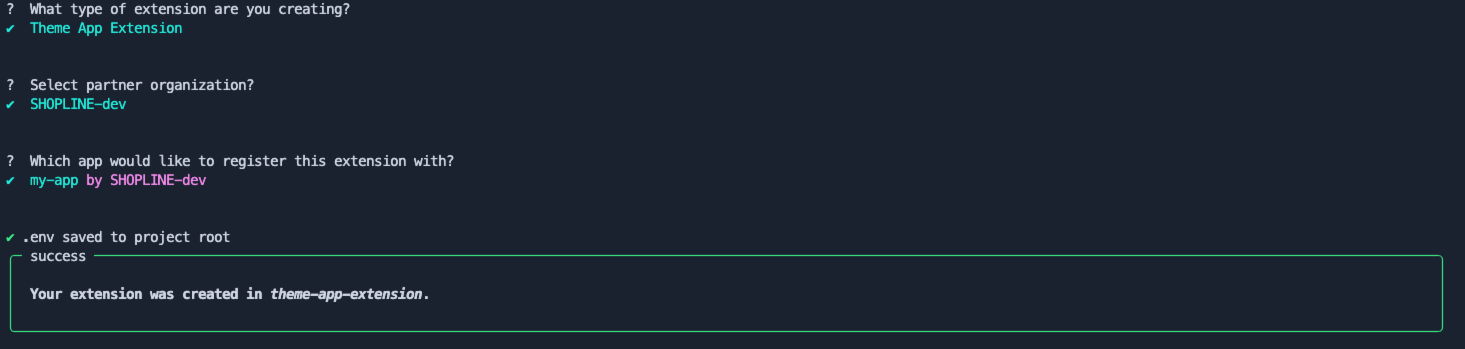
Step 2: Push the theme app extension
- Navigate to the theme app extension directory.
cd theme-app-extension
- Push the theme app extension.
sl extension push
-
Follow the prompts and choose the appropriate options.
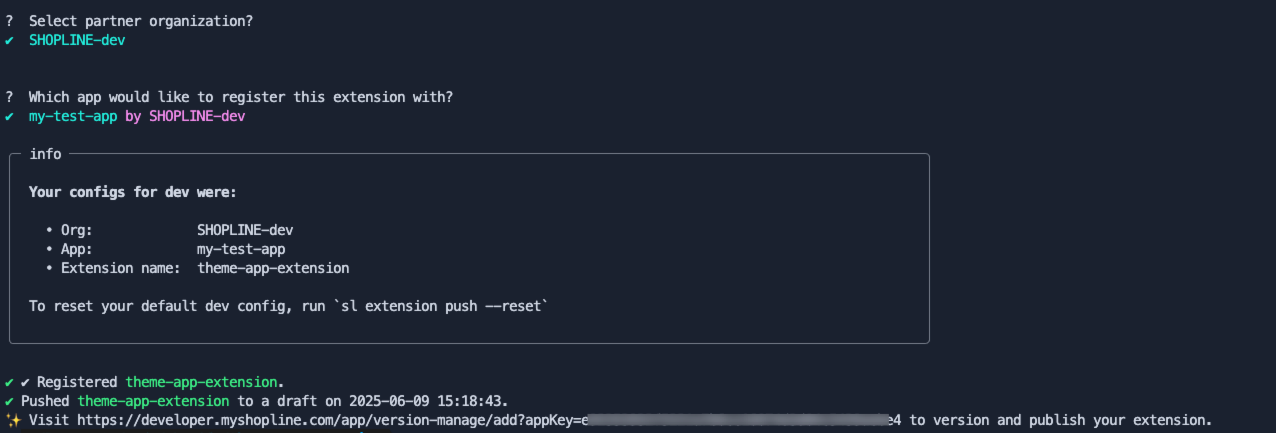
-
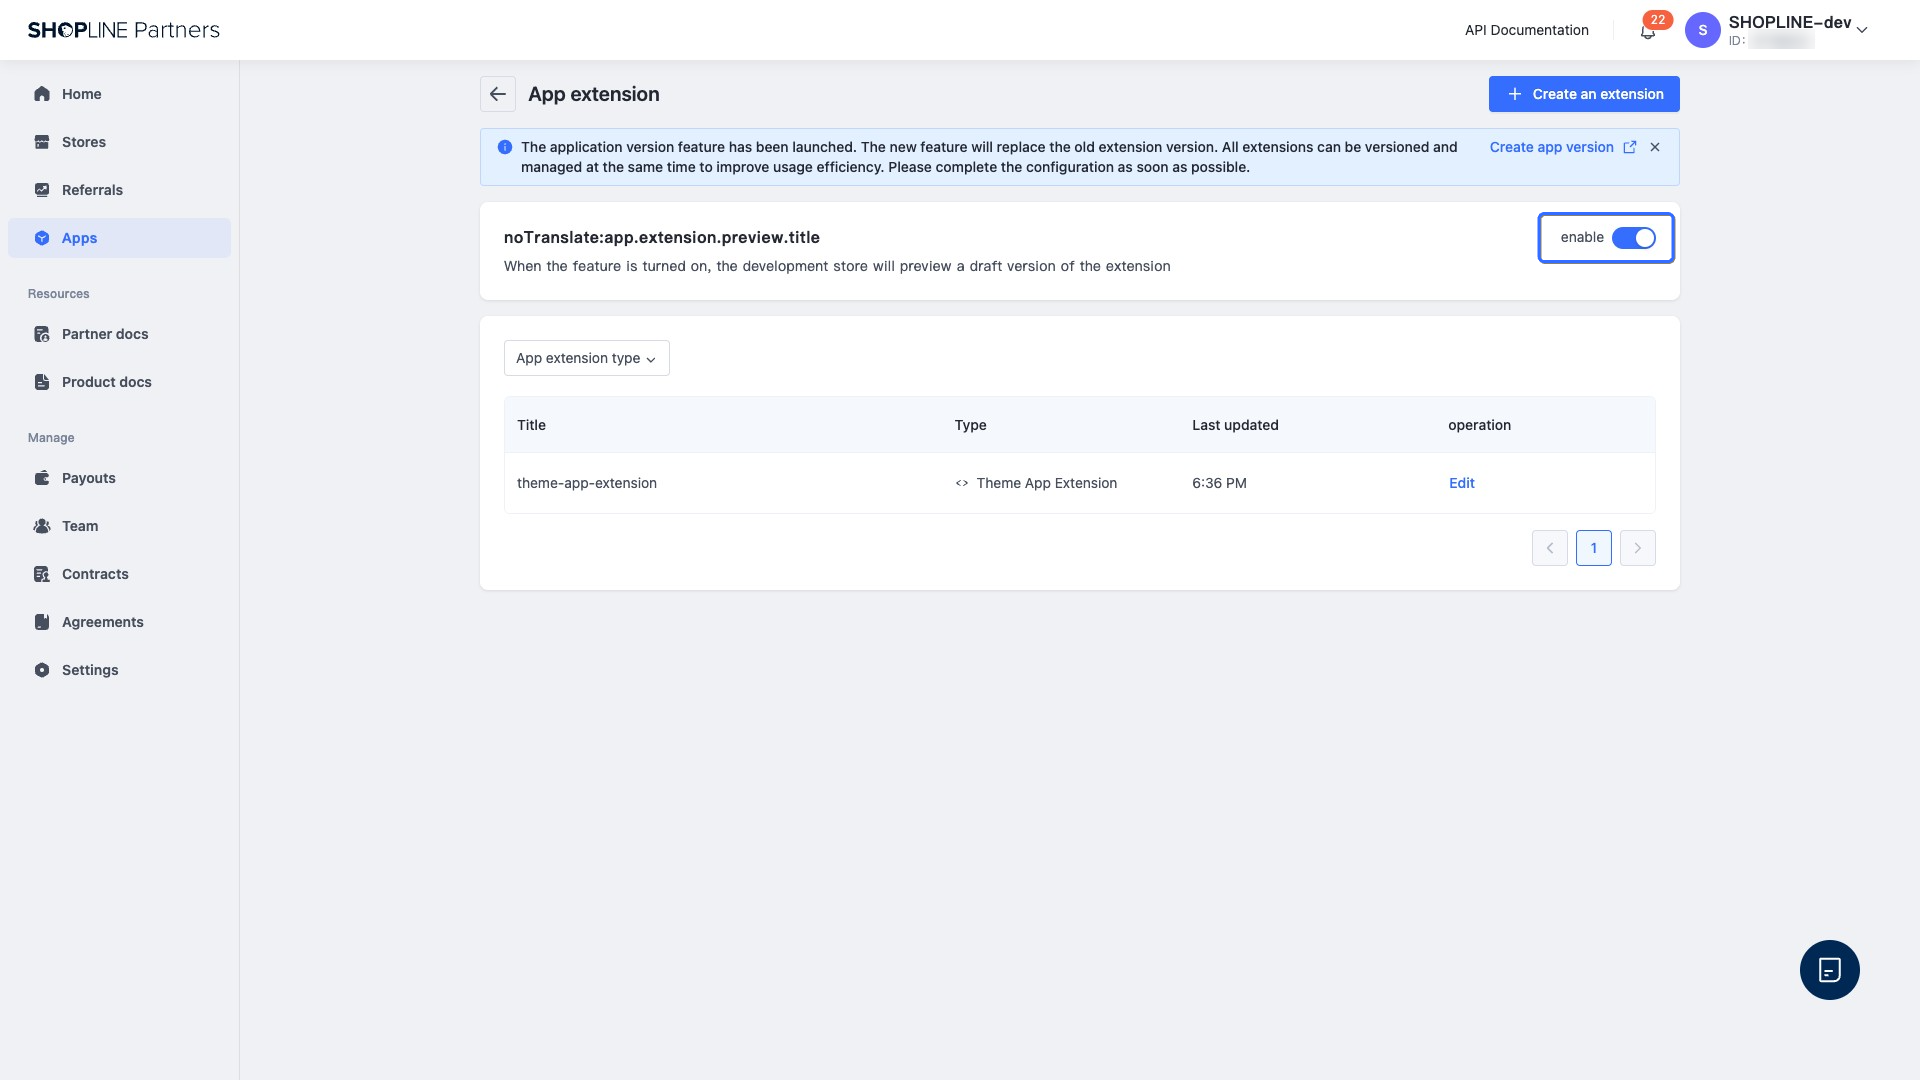
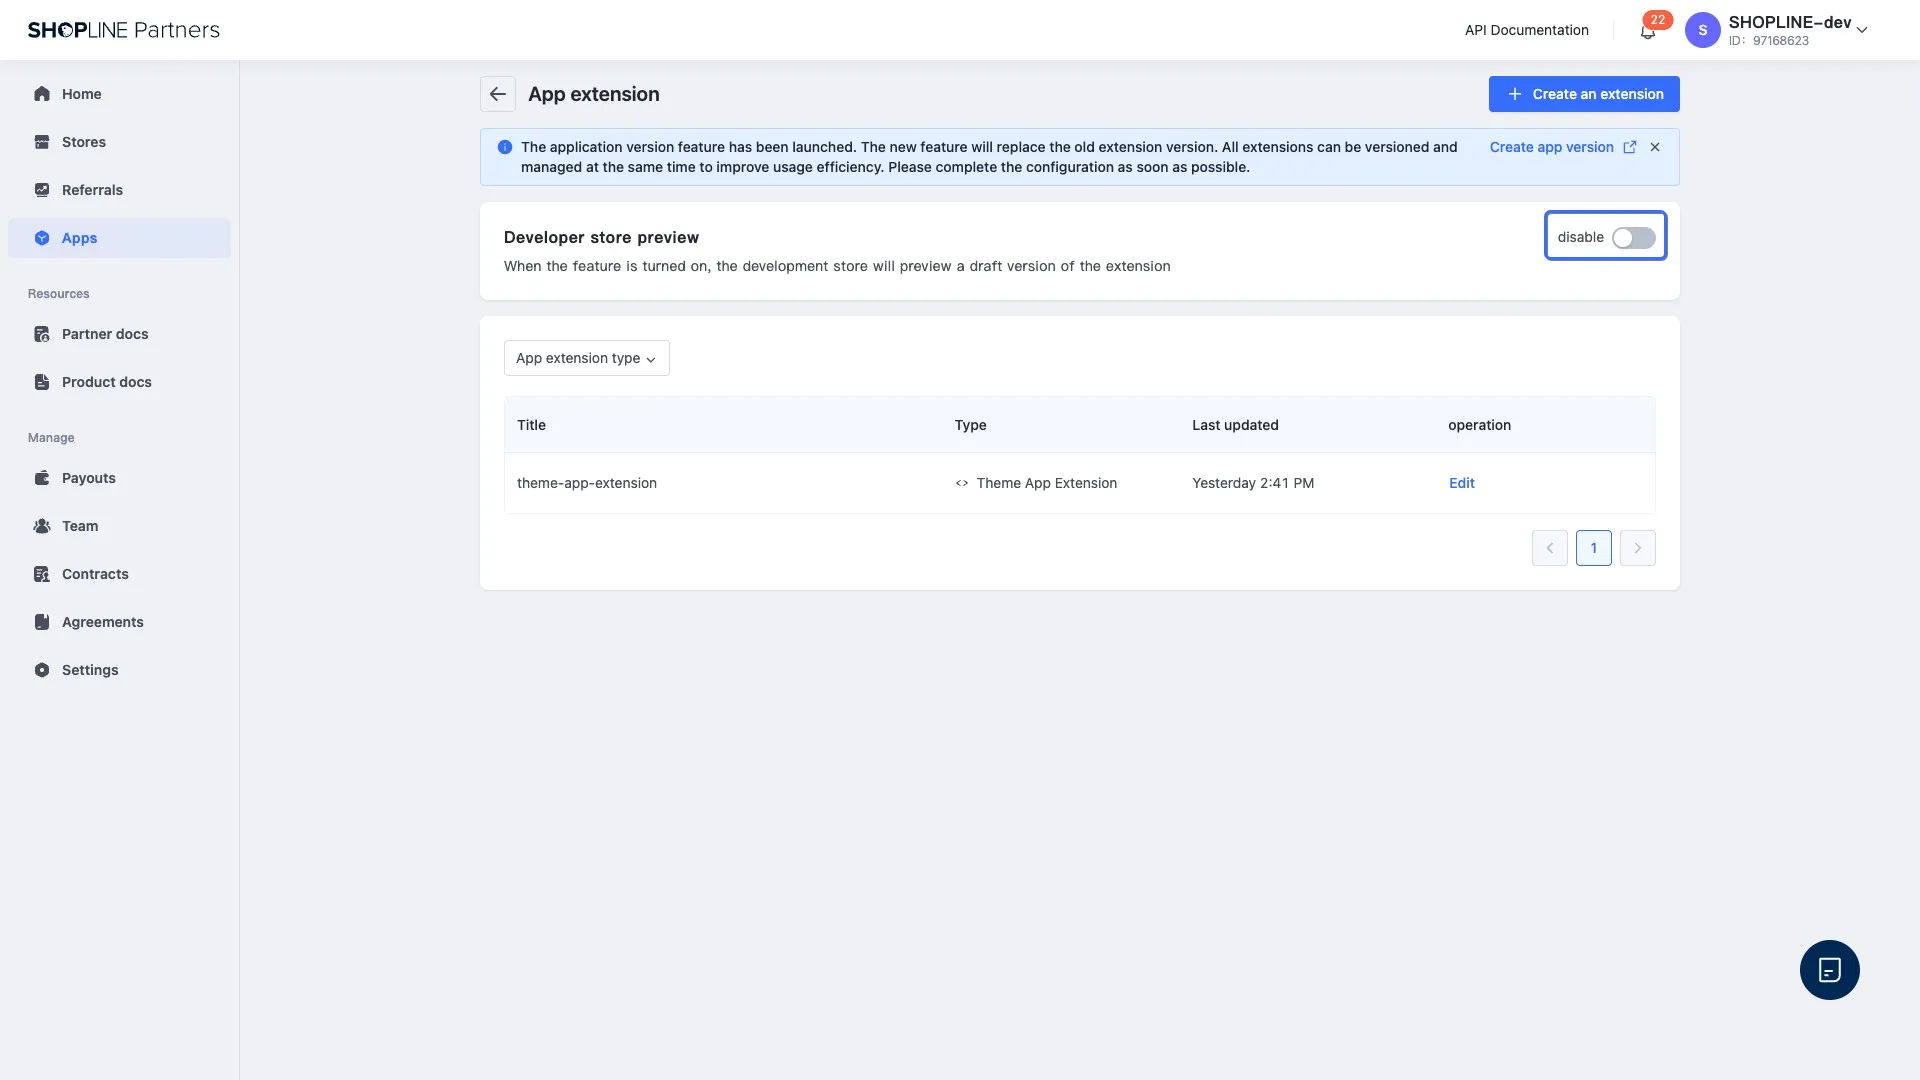
Click the link to visit the SHOPLINE Partner Portal. Find the theme app extension and click the toggle button as shown in the following image to change the app extension to a draft version.
Step 3: Test your changes
-
In your SHOPLINE Admin, go to Online Store, select the OS 3.0 version theme, and click the Design button to enter the theme editor.
-
In the theme editor, click Add component, select the Apps tab, and add your app to the theme.
-
Save the changes to the theme.
-
Verify that the theme app extension functions as expected.
Step 4: Publish the theme app extension
- Push the theme app extension to the SHOPLINE Partner Portal.
sl extension push
-
After a successful push, the system will automatically generate and display a link in the terminal, which directs to the current app version page in the Partner Portal.
-
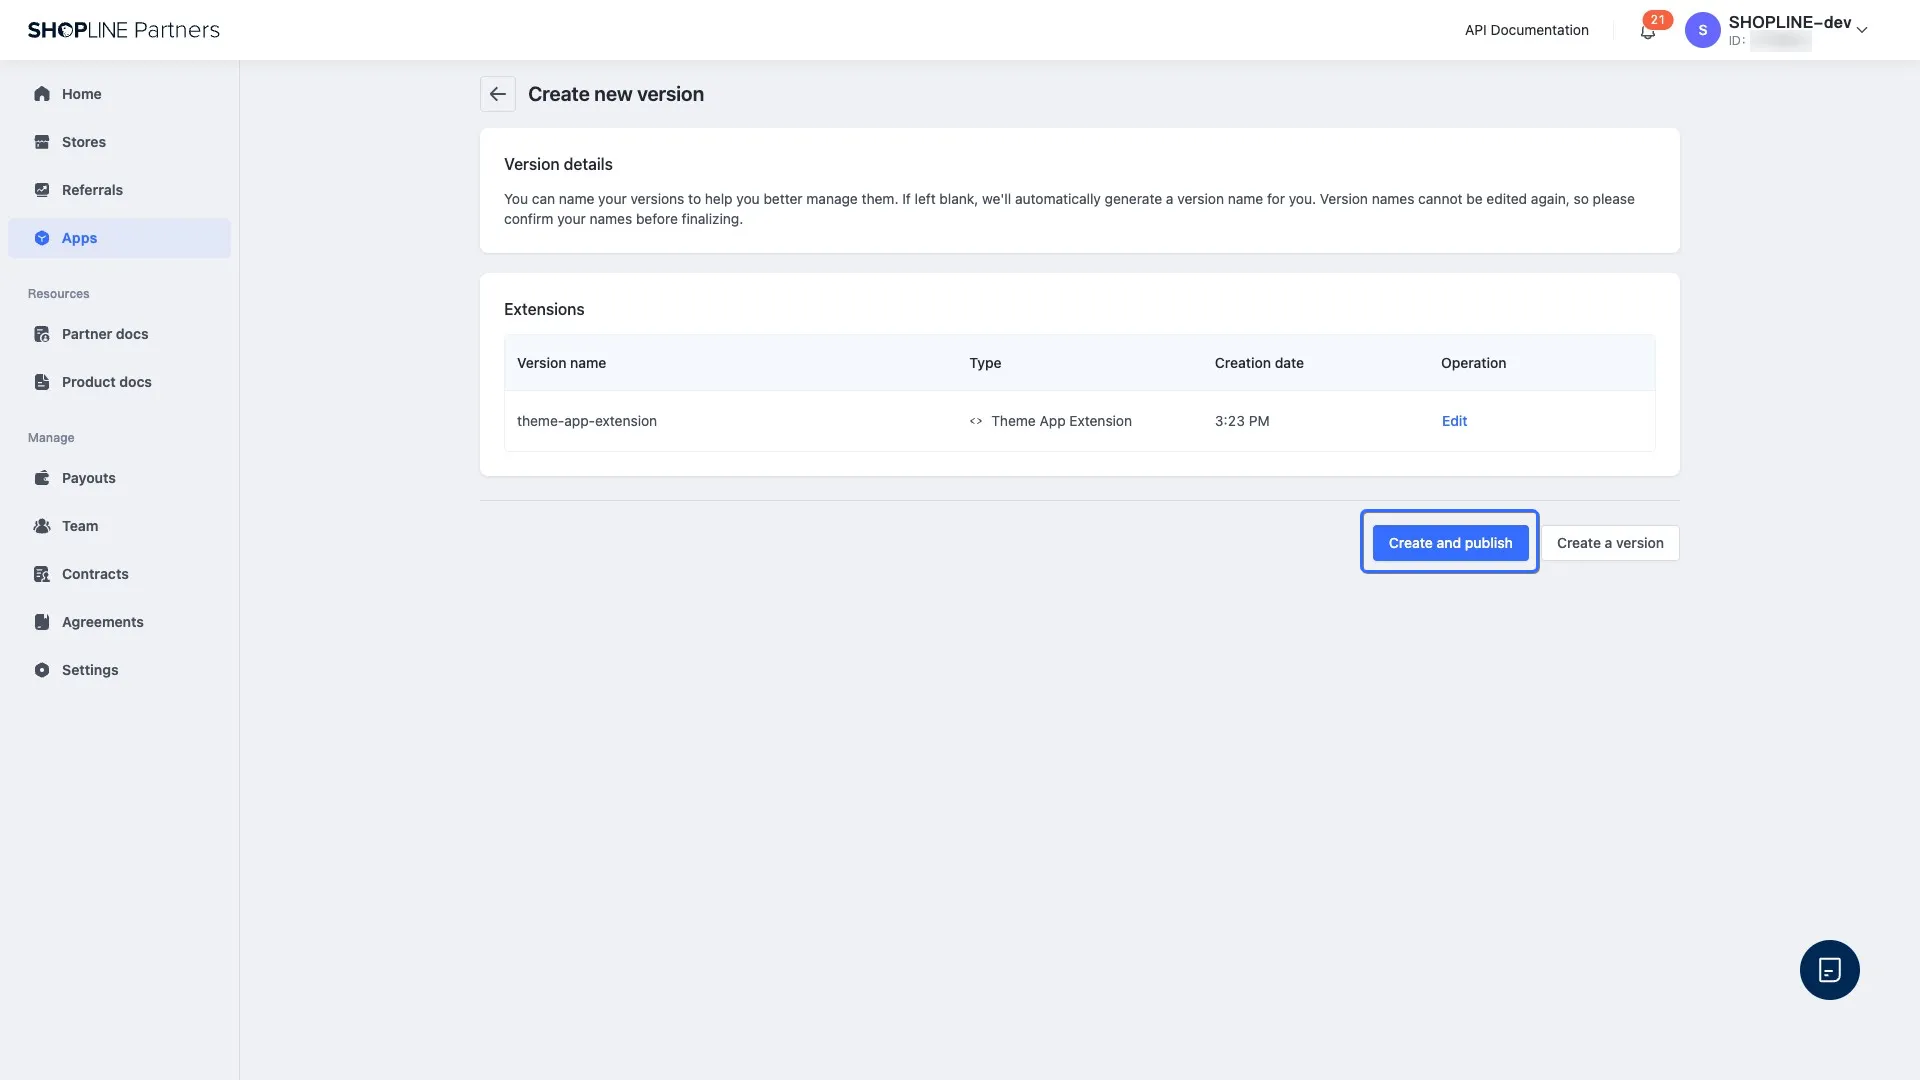
Click the link to enter the app version. Then click Create new version.
-
Close and disable the preview of the draft version extension.
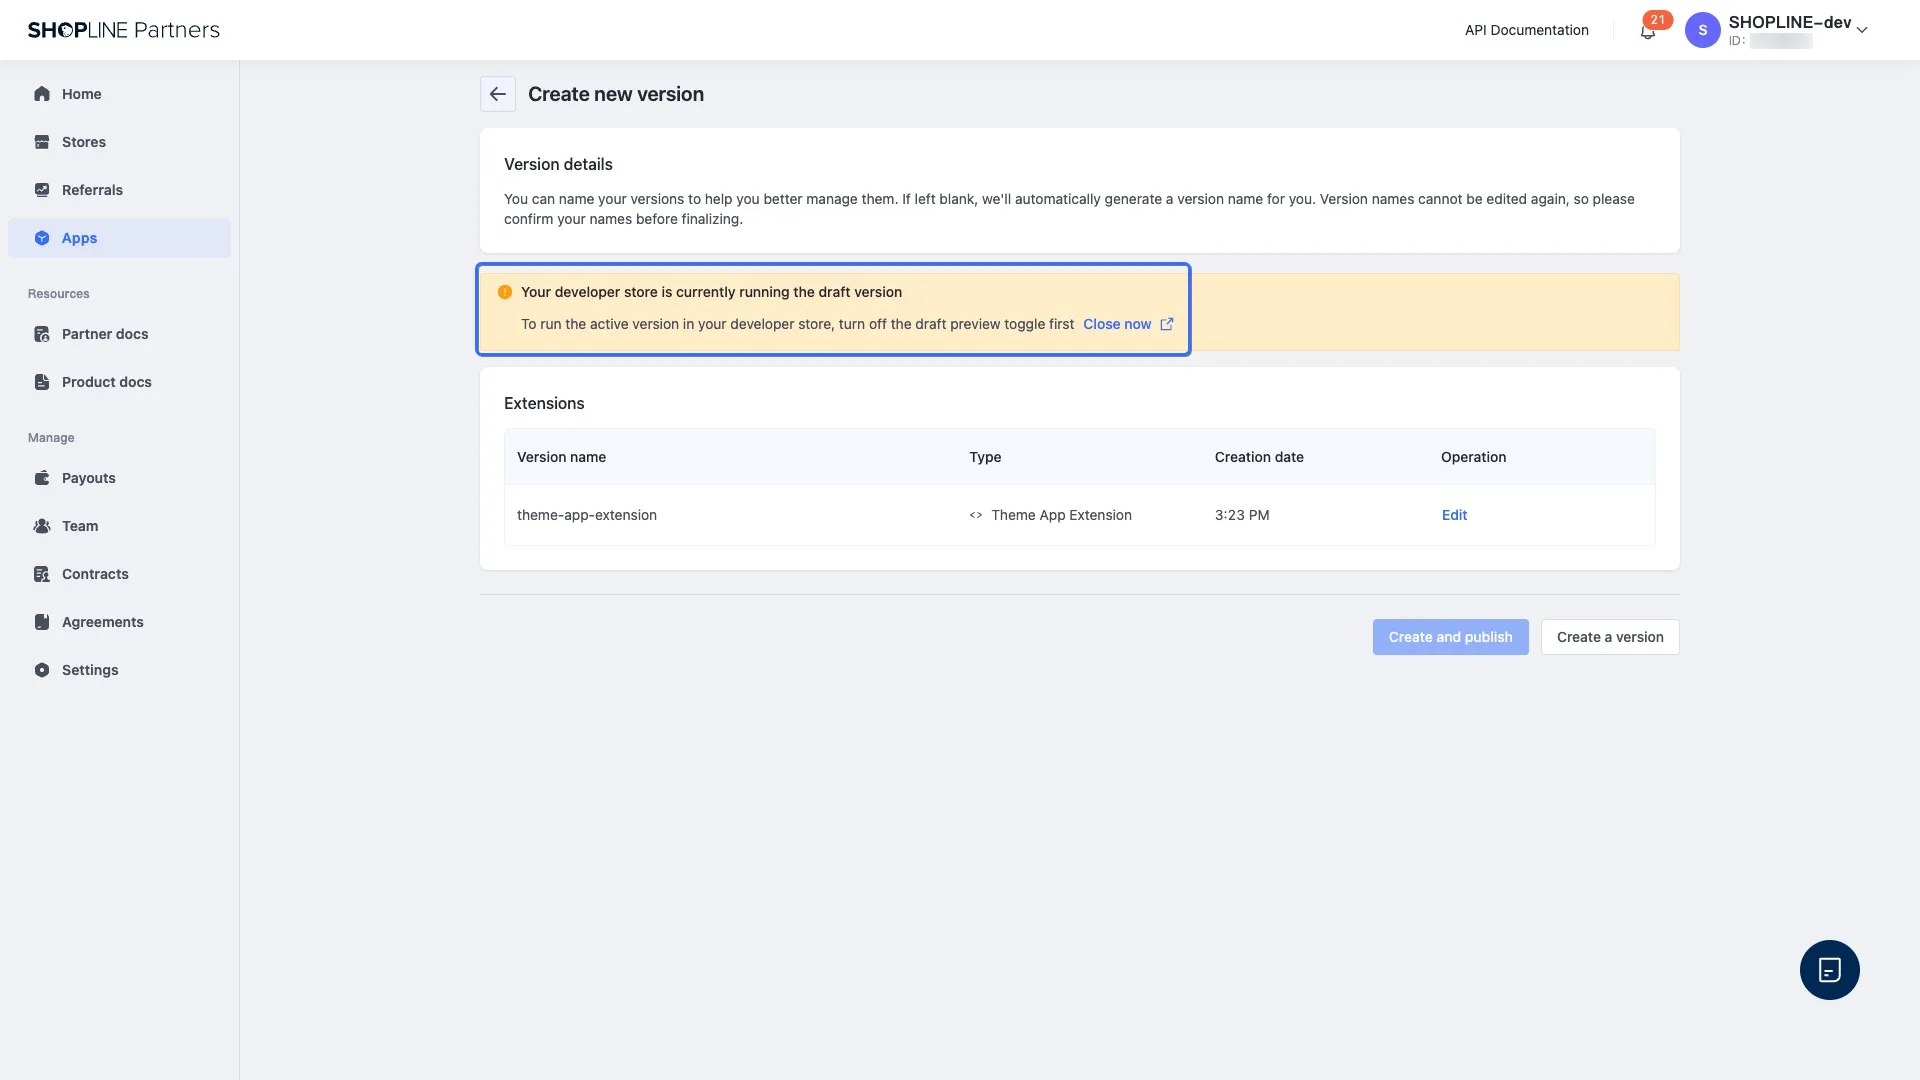
-
Click the back button, find App version, and click to enter. Then create and publish the extension version here.

'%3e%3crect%20x='6'%20y='7.13049'%20width='13'%20height='10'%20rx='1'%20fill='black'/%3e%3cpath%20d='M12.4998%2012.936L-3.65042%200.604835L28.65%200.604838L12.4998%2012.936Z'%20stroke='white'%20stroke-linejoin='round'/%3e%3c/g%3e%3cdefs%3e%3cclipPath%20id='clip0_716_14611'%3e%3crect%20x='6'%20y='7.13049'%20width='13'%20height='10'%20rx='1'%20fill='white'/%3e%3c/clipPath%3e%3c/defs%3e%3c/svg%3e)

'%3e%3crect%20x='5.63086'%20y='7.26086'%20width='13'%20height='10'%20rx='1'%20fill='white'/%3e%3cpath%20d='M12.1306%2013.0664L-4.01956%200.735206L28.2809%200.735209L12.1306%2013.0664Z'%20stroke='%231A2C42'%20stroke-linejoin='round'/%3e%3c/g%3e%3cdefs%3e%3cclipPath%20id='clip0_716_14599'%3e%3crect%20x='5.63086'%20y='7.26086'%20width='13'%20height='10'%20rx='1'%20fill='white'/%3e%3c/clipPath%3e%3c/defs%3e%3c/svg%3e)