Private app configuration instructions
By creating a private App through the store backend, you can:
- Streamline the process of integrating authorization logic and give merchants full control over the app.
- Add functionality within the SHOPLINE backend.
- Directly access store data using the SHOPLINE API.
- Extend your online store to other platforms using the Storefront API.
This distribution method is particularly suitable for scenarios that require extensive customization capabilities and have higher data management requirements.
Whether you develop the App internally or hire third-party developers to implement it, this approach can help you quickly obtain the capabilities you need.
Prerequisites
- Distribution methods for SHOPLINE apps
- Familiarity with the App creation process for different distribution methods
How to Configure a Private App
Step 1: Create the App
- Go to the "Apps" module in the app marketplace and click on "Develop an App" to access the management list for private apps.

- Provide the following basic information for the app:
- App name: A unique identifier for recordkeeping and management purposes.
- App developer: The person or entity responsible for creating the app, facilitating merchant management and future maintenance.
- App contact email: An email address for communication and support purposes when users encounter issues.

Step 2: Configure Permission Scope
- Click on "Edit" in the app list to access the app configuration page.

- Before installing and obtaining an access token, it is necessary to configure the allowed permissions for app access. The administration backend provides management capabilities for Rest Admin API, Webhook, and Storefront API.
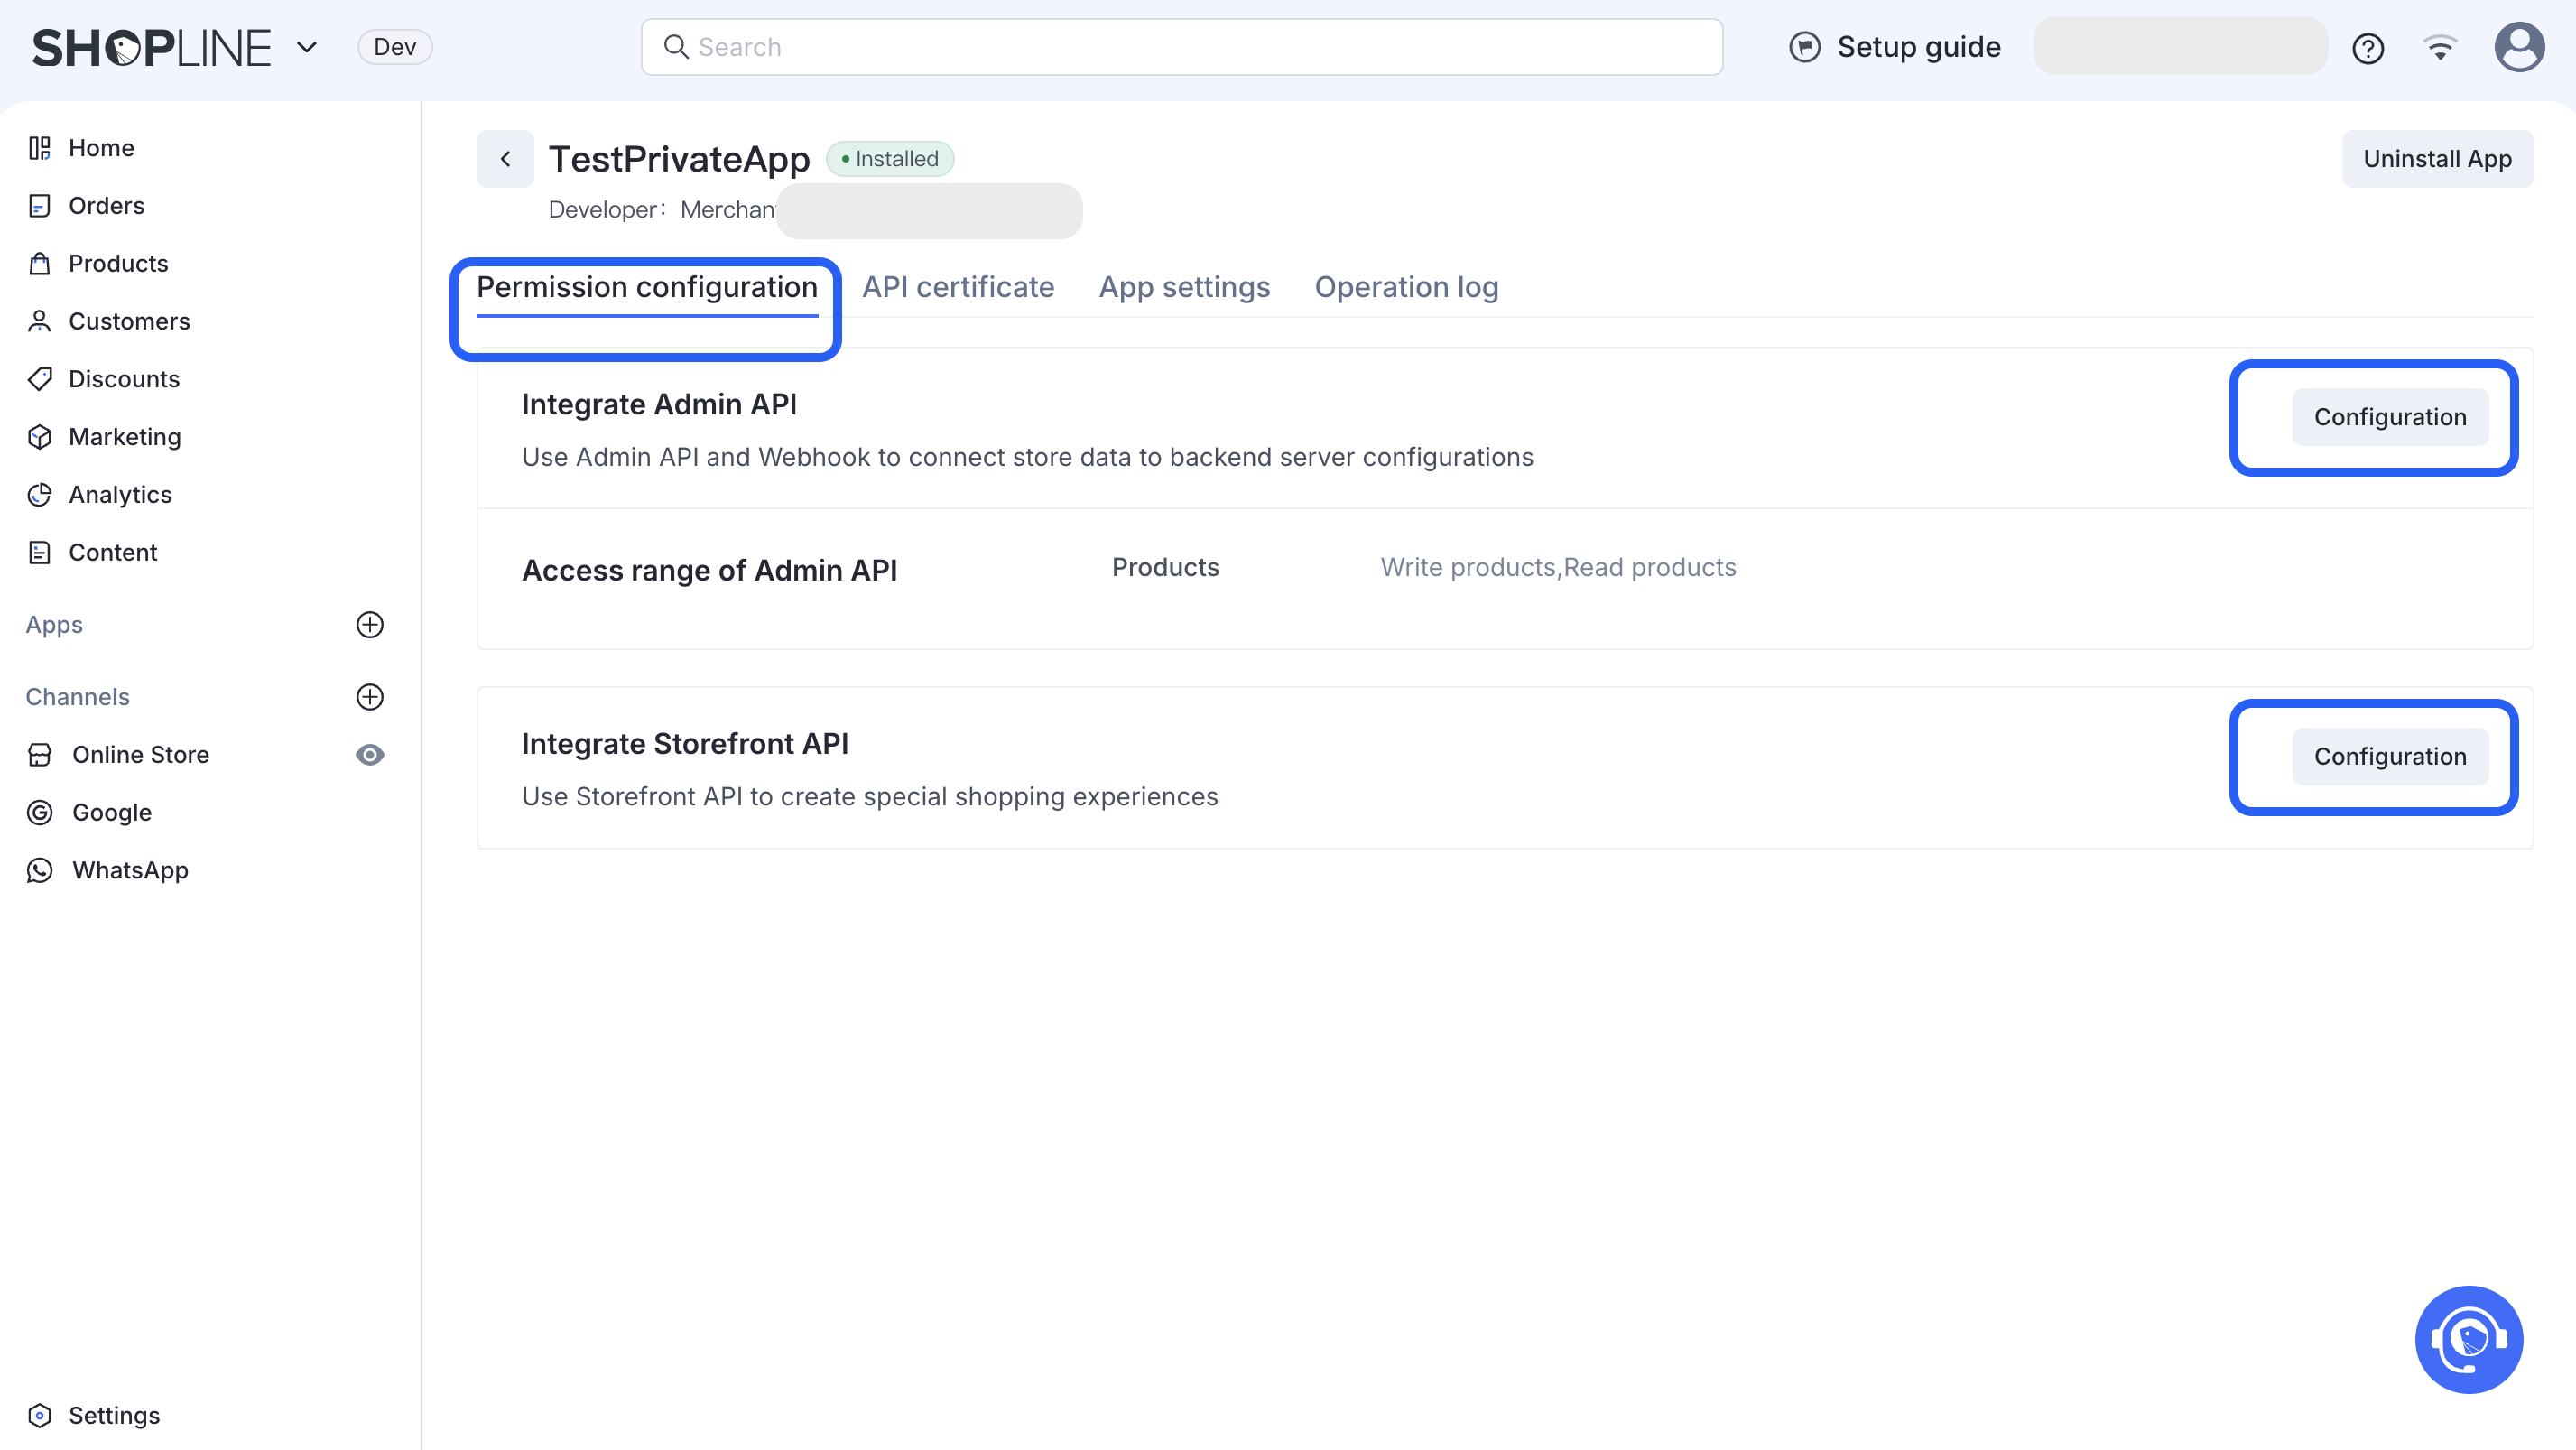
3. Integration with Backend API
- Determines which interfaces the app can call to access and manipulate store backend data.
- For example, selecting "Edit Product" allows the app to access the corresponding Rest Admin API related to "Edit Product". The relationship between interfaces and permissions can be found in the Scope Point List.

- It also supports managing events to be monitored in this module.
- Select the desired event name to subscribe to.
- Notification URL: When the store triggers this event, the platform will send the message to the provided address.
- Event version: The platform will release a fixed API version every quarter, as described in the API Versioning Guide. When the subscribed event version is deprecated, the platform will return the content based on the current oldest version.

4. Integration with Storefront API
- Similar to configuring the Backend API, after checking the corresponding options, the app can invoke the interfaces with the corresponding permissions. The relationship between interfaces and permissions can also be referred to in the Scope Point List.

STEP 3 Install the App
- After setting up the permissions, switch to "API Credentials" and click "Install App" to establish the association between the store and the app.

STEP 4 Obtain Access Tokens
- After installing the app, the access tokens will be available. There are two types of access tokens depending on the permissions assigned:
- When Backend API permissions are assigned, an Access Token will be generated for requesting the Rest Admin API.
- When Storefront API permissions are assigned, a Storefront Token will be generated for requesting the Storefront API.

- To ensure the security of the backend data, the Access Token requires authentication before accessing it. When viewing the backend API access token, the system will send a verification code to your login email. You need to enter the correct verification code to view and copy the Access Token.

Private app access
- After obtaining the access tokens, the app can use the tokens to call the APIs within the assigned permission scope.
- Private apps cannot utilize capabilities like App Bridge and App Proxy as public apps do. They cannot be integrated into the SHOPLINE backend. Therefore, you need to prepare a separate app entry that can be accessed independently.
- For usage restrictions regarding tokens, refer to App authorization.
Management of private apps
Modifying permission scope
On the permission configuration page, you can modify the Backend API permissions and Storefront API permissions assigned to the app at any time.
- Changes to permissions do not require modifying the token.
- The platform automatically handles the accessible permission scope of the token.
Please note that removing a previously assigned permission from the app will affect its access to the corresponding interfaces. Therefore, when revoking a permission authorization, ensure that the app no longer requires that permission.
Modifying webhook event subscriptions
Whether adding or canceling event subscriptions, the changes take effect immediately after you save them. Unconsumed webhook notifications do not have any impact on your store.
Please note that for each notification, the platform expects the app to provide a successful callback.
- If there are no correct callbacks for an extended period, the platform considers it an invalid subscription and removes it.
- Afterward, the app will no longer receive messages when events are triggered in the store until you subscribe to them again.
For detailed rules, refer to the Webhook Management Mechanism.
Uninstalling an app
On the management page of the private app, you can uninstall the app at any time.
- Once uninstalled, the token will be revoked, and access to store data will be discontinued.
- When reinstalling, the platform will assign a new access token to the app.
Deleting the App
Deleting the app is an irreversible operation and cannot be recovered.
If you only want to temporarily disable the app, you can choose to uninstall instead of deleting.
App Operation Logs
Every important operation is recorded in the operation log page, where you can view or trace the change logs of the app.


'%3e%3crect%20x='6'%20y='7.13049'%20width='13'%20height='10'%20rx='1'%20fill='black'/%3e%3cpath%20d='M12.4998%2012.936L-3.65042%200.604835L28.65%200.604838L12.4998%2012.936Z'%20stroke='white'%20stroke-linejoin='round'/%3e%3c/g%3e%3cdefs%3e%3cclipPath%20id='clip0_716_14611'%3e%3crect%20x='6'%20y='7.13049'%20width='13'%20height='10'%20rx='1'%20fill='white'/%3e%3c/clipPath%3e%3c/defs%3e%3c/svg%3e)

'%3e%3crect%20x='5.63086'%20y='7.26086'%20width='13'%20height='10'%20rx='1'%20fill='white'/%3e%3cpath%20d='M12.1306%2013.0664L-4.01956%200.735206L28.2809%200.735209L12.1306%2013.0664Z'%20stroke='%231A2C42'%20stroke-linejoin='round'/%3e%3c/g%3e%3cdefs%3e%3cclipPath%20id='clip0_716_14599'%3e%3crect%20x='5.63086'%20y='7.26086'%20width='13'%20height='10'%20rx='1'%20fill='white'/%3e%3c/clipPath%3e%3c/defs%3e%3c/svg%3e)