Install and activate a payment app
This article explains how the SHOPLINE platform interacts with your server in the process of merchants binding and activating payment apps, to provide high-quality services for merchants.
How the merchant discovers and activates payment apps
Canary testing control of payment apps
After your payment app is approved, it is invisible to all merchants by default. You need to contact the SHOPLINE review team to whitelist specific merchants for canary access. During the canary testing stage, only the stores included in the canary testing can view the app.
After sufficient testing, you may contact the SHOPLINE review team again to roll out the app in full scale. After full rollout, the payment app will be visible to all merchants.
Merchants set up payment apps
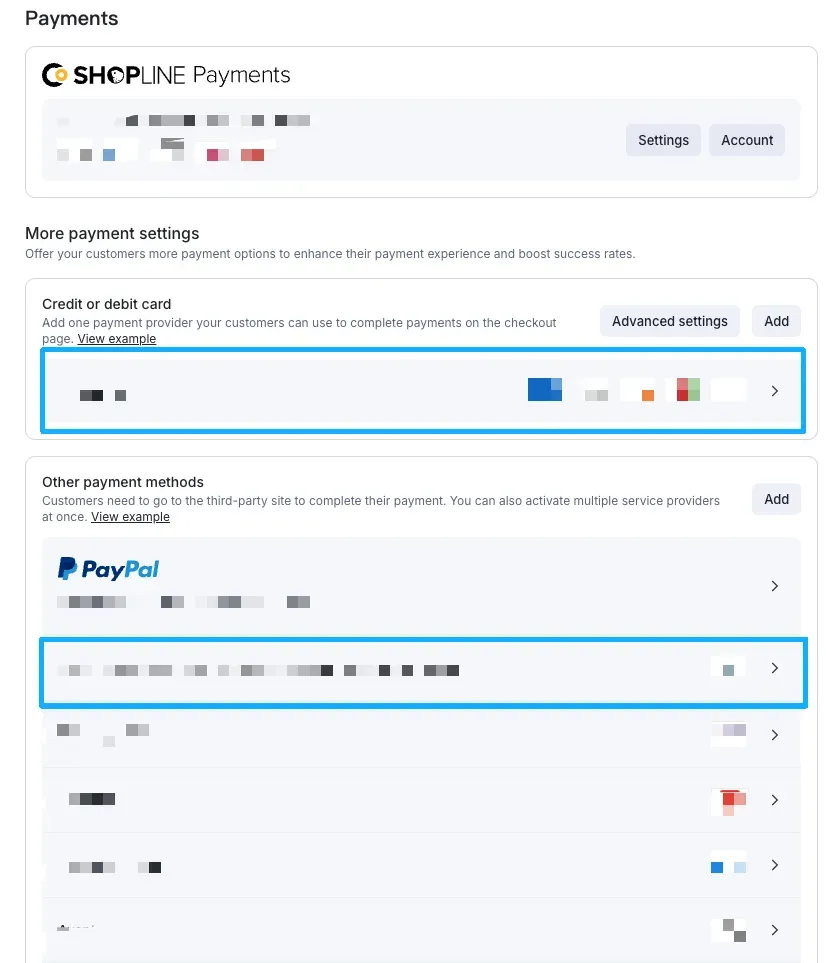
If the payment app is visible to the current store, the merchant can configure it directly in the SHOPLINE Admin > Settings > Payments page:
- Credit card-based payment apps: Merchants select the app via the entry Payments > Credit or debit card > Add.
- Redirect-based payment apps: Merchants select the app via the entry Payments > Other payment methods > Add.

Installing and activating payment apps
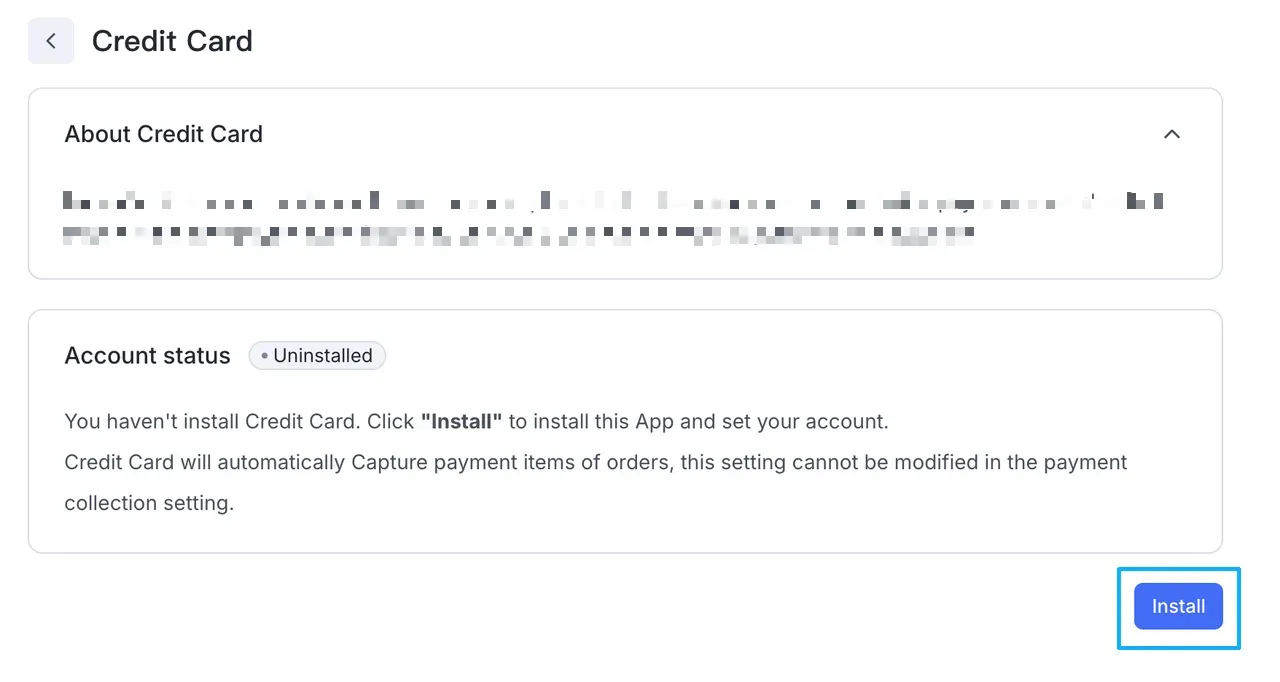
The merchant selects the specific payment app on the addition page. After clicking the desired app, the merchant will be directed to the payment app installation page. Click Install to complete the installation as prompted. The merchant can add the payment app as a payment method, which will ultimately be available for buyers to use on the checkout page.

Payment app installation and uninstallation
Installation and activation

-
On the payment app addition page, the merchant clicks Install (step 1 in the previous flow chart).
-
SHOPLINE redirects the merchant to the app URL (Steps 2–3 in the previous flow chart).
-
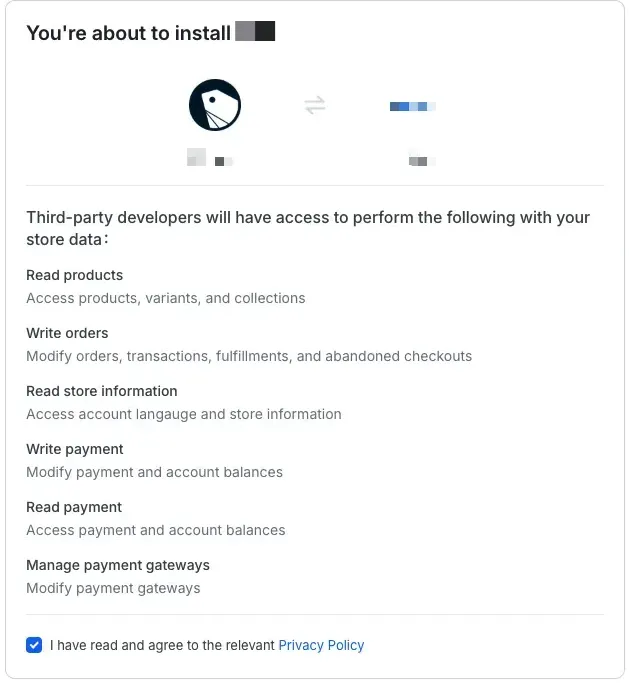
Upon receiving the request at your App's URL, the payment app must verify whether the merchant has installed and authorized the app. If the merchant has not completed authorization, guide them to finish the app authorization process (step 4 in the previous flow chart).
-
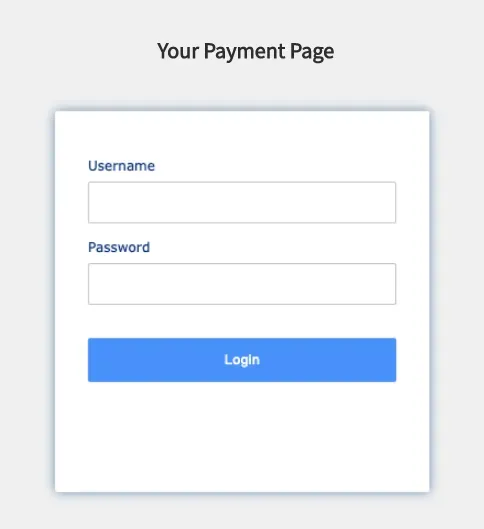
After the merchant completes app authorization, the payment app must redirect the merchant to the payment account binding page. This page, independently developed and maintained by the payment app provider, is used to collect the merchant’s payment account information and establish the association relationship between the SHOPLINE store and the payment account (steps 5–7 in the previous flow chart). An example of account binding page is as follows.
-
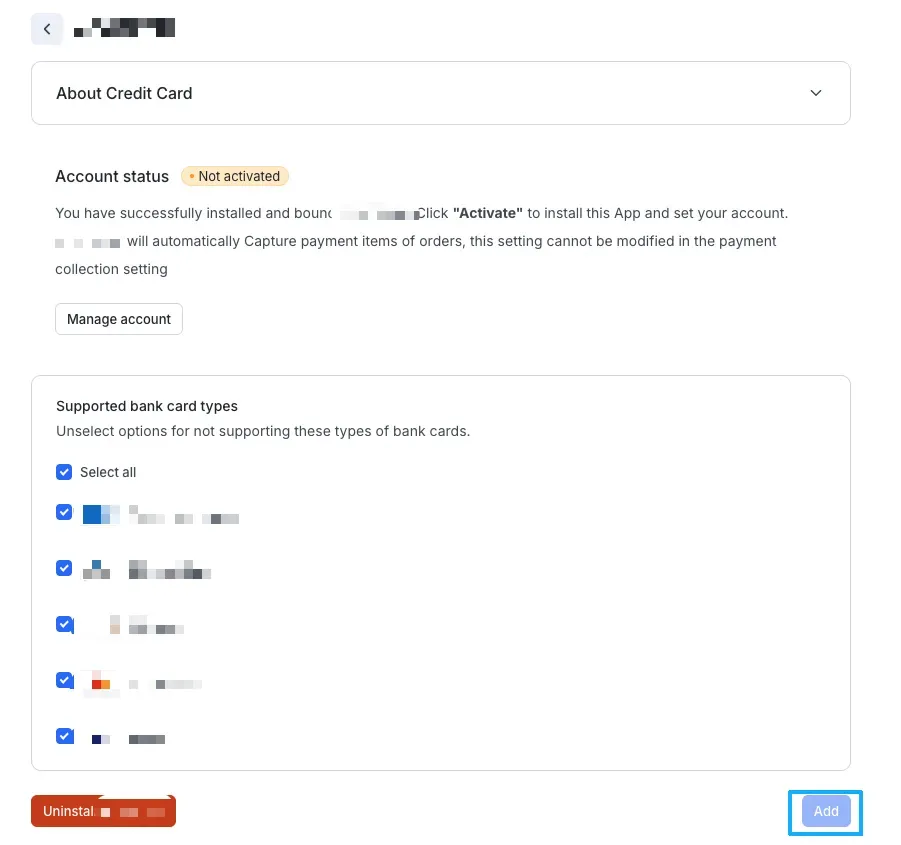
After the merchant completes account binding on the payment account binding page, the payment app must redirect the merchant back to the Payment settings details page of SHOPLINE to finalize the payment method activation (Steps 8–10 in the previous flow chart).
- URL format of the Payment settings details page:
https://{handle}.myshopline.com/admin/settings/payments/appInstall?appKey={yourAPPKey} - Example:
- URL format of the Payment settings details page:
-
At the same time, the payment app must call the Merchant activation successful notification API to actively notify SHOPLINE of the successful binding of the payment account. After sending the notification, the merchant can complete the final payment method activation on the SHOPLINE Payment settings details page (Step 11 in the previous flow chart).
-
The merchant activates the SHOPLINE payment app. The entire installation and activation process of the payment app is now complete. Buyers can subsequently use the payment app on the checkout page (Steps 12–13 in the previous flow chart).
Uninstallation
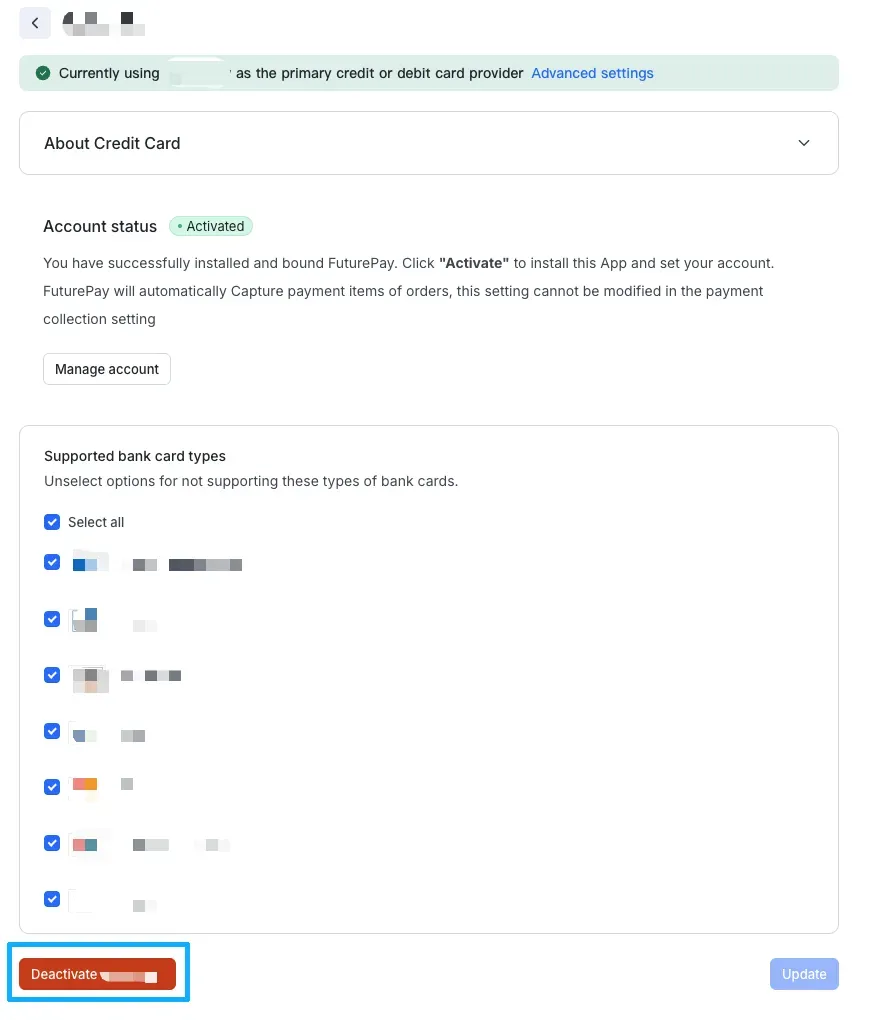
To uninstall the activated payment app, go to SHOPLINE Admin > Settings > Payments.
 Click the activated payment app to enter the Payment settings details page to uninstall the app.
 SHOPLINE will then notify the merchant that the App installation status changed. The payment app provider must monitor this event and maintain accurate merchant data to ensure that the merchant can properly re-initiate the app authorization process when reactivating the app.

'%3e%3crect%20x='6'%20y='7.13049'%20width='13'%20height='10'%20rx='1'%20fill='black'/%3e%3cpath%20d='M12.4998%2012.936L-3.65042%200.604835L28.65%200.604838L12.4998%2012.936Z'%20stroke='white'%20stroke-linejoin='round'/%3e%3c/g%3e%3cdefs%3e%3cclipPath%20id='clip0_716_14611'%3e%3crect%20x='6'%20y='7.13049'%20width='13'%20height='10'%20rx='1'%20fill='white'/%3e%3c/clipPath%3e%3c/defs%3e%3c/svg%3e)

'%3e%3crect%20x='5.63086'%20y='7.26086'%20width='13'%20height='10'%20rx='1'%20fill='white'/%3e%3cpath%20d='M12.1306%2013.0664L-4.01956%200.735206L28.2809%200.735209L12.1306%2013.0664Z'%20stroke='%231A2C42'%20stroke-linejoin='round'/%3e%3c/g%3e%3cdefs%3e%3cclipPath%20id='clip0_716_14599'%3e%3crect%20x='5.63086'%20y='7.26086'%20width='13'%20height='10'%20rx='1'%20fill='white'/%3e%3c/clipPath%3e%3c/defs%3e%3c/svg%3e)